How to Apply Dip Powder for Long-Lasting, Salon-Quality Nails at Home
Applying dip powder nails involves preparing your natural nails, applying a bonding base, dipping each nail into the color powder, sealing with an activator, and finishing with a top coat to create a durable, long-lasting manicure. This method offers a sturdy, chip-resistant alternative to traditional polish and gel nails.
Dip powder nails have surged in popularity because they combine the convenience of at-home application with the professional-quality finish of salon treatments. Unlike gel nail polish, the powder creates a strong, lightweight coating that generally lasts longer and resists chipping, making it ideal for both casual users and those wanting a polished look that endures daily wear.
This article will walk you through every step in how to apply dip powder correctly, outline the essential tools you’ll need, cover common mistakes to avoid, review different powder types, and provide care tips to maintain your manicure. Whether you’re a beginner or looking to refine your technique, you’ll find practical advice here.
Essential Tools and Preparation for Dip Powder Application

Gathering the Right Dip Powder Nail Kit
Choosing a complete dip powder nail kit simplifies the application process. These kits usually include base and top coats, activator, colored powders, and nail prep supplies, saving you from sourcing each item separately. Quality varies, so pick a kit with good reviews and clear instructions.
Look for powders that offer a range of colors and a non-toxic formula. The base coat should be strong to promote adhesion without damaging your natural nails, and the activator must dry quickly to harden the powder efficiently.
- Base coat and activator
- Colored dip powders
- Nail buffer and file
- Cuticle pusher and brush
Prepping Your Nails for Best Results
Effective nail prep is critical for dip powder nails to last. Begin by washing and drying your hands thoroughly. Use a cuticle pusher to gently push back nails and remove any dead skin around the edges to avoid lifting.
Lightly buff the nail surface to remove shine but avoid over-filing, as thinning nails can weaken them. Clean nails with isopropyl alcohol or nail cleanser to eliminate oils and dust, ensuring the base coat bonds perfectly.
Step-by-Step Dip Powder Application Techniques

Applying Base Coat and Color Dipping
Apply a thin, even layer of base coat on a single nail and immediately dip it at a 45-degree angle into the chosen color powder. Tap off excess powder gently to avoid clumps. Repeat dipping once or twice for opaque coverage depending on your desired intensity.
Always work on one nail at a time to prevent the base coat from drying too quickly. After dipping, use a small brush to remove residual powder from around the nail and skin before moving to the next step.
- Dip at a 45-degree angle for full coverage
- Avoid thick base coat layers to prevent clumping
- Use a soft brush to clear excess powder
Activating and Sealing the Nail
After completing all nails, apply the activator liquid evenly. This step hardens the powder and sets the manicure, typically drying in about 2-3 minutes. Follow by lightly buffing the nails with a fine buffing block to smooth imperfections.
Finish by applying two layers of the top coat, allowing each layer to fully dry before adding the next. This final seal protects your dip powder nails from scratches and moisture, extending their lifespan.
- Activator dries in 2-3 minutes
- Buff nails to smooth surface
- Apply two thin layers of top coat
Choosing the Best Dip Powder for Your Nail Type

Color and Finish Options
Dip powders come in matte, glossy, shimmer, and chrome finishes. Selecting the finish depends on your personal style or occasion. Matte powders offer a subtle look, while shimmer adds sparkle for special events.
Keep in mind that some powders might require more maintenance, such as chipping-proof formulas or those with added strengthening ingredients, useful if you have brittle nails.
- Matte, glossy, shimmer, chrome finishes
- Formulas with nail-strengthening additives
- Wide color spectrum for customization
For more on this, see our related guide: How to Use a Hair Trimmer on Your Neckline for a Clean, Sharp Finish.
Powders for Sensitive or Weak Nails
If you have sensitive skin or weak nails, opt for dip powders free from harsh chemicals like formaldehyde, toluene, and DBP. Hypoallergenic and breathable powders reduce irritation risks and maintain nail health.
Look for kits that include nourishing cuticle oils or vitamin-enriched formulas post-application to support nail strength and moisture retention.
Common Application Mistakes and How to Avoid Them

Avoiding Clumps and Uneven Layers
Applying thick base coats can cause powder clumping and an uneven appearance. Thin, precise layers and quick dipping help achieve a smooth finish. Also, ensure the powder is tapped off well after dipping to prevent buildup.
Improper angle or hurried dipping may lead to uneven coverage. Focus on controlled, consistent motions and examine each nail carefully before moving on.
- Use thin base coat layers
- Dip nails at consistent angles
- Tap off excess powder thoroughly
Preventing Lifting and Peeling
Insufficient nail prep or oily residue often causes the dip powder to lift or peel prematurely. Proper buffing, cuticle removal, and cleaning with alcohol before application help secure adhesion.
Avoid getting base or activator liquids on the skin surrounding your nails as this can cause lifting. Cleaning edges immediately after dipping keeps the polish sealed to just the nail surface.
Maintaining and Removing Dip Powder Nails
Daily Care Tips to Prolong Wear
To extend the life of your dip powder manicure, regularly moisturize your cuticles with oil and wear gloves during cleaning or gardening to prevent damage. Avoid harsh chemicals that can weaken the top coat.
Light filing or buffing between applications helps maintain smooth edges and avoids chips. Reapplying a thin top coat halfway through your wear period can also refresh shine and protection.
- Use cuticle oil daily
- Wear gloves for chores
- Reapply top coat as needed
For more on this, see our related guide: How to Choose a Posh Full Service Nail Salon for the Best Experience.
Safe Dip Powder Nail Removal
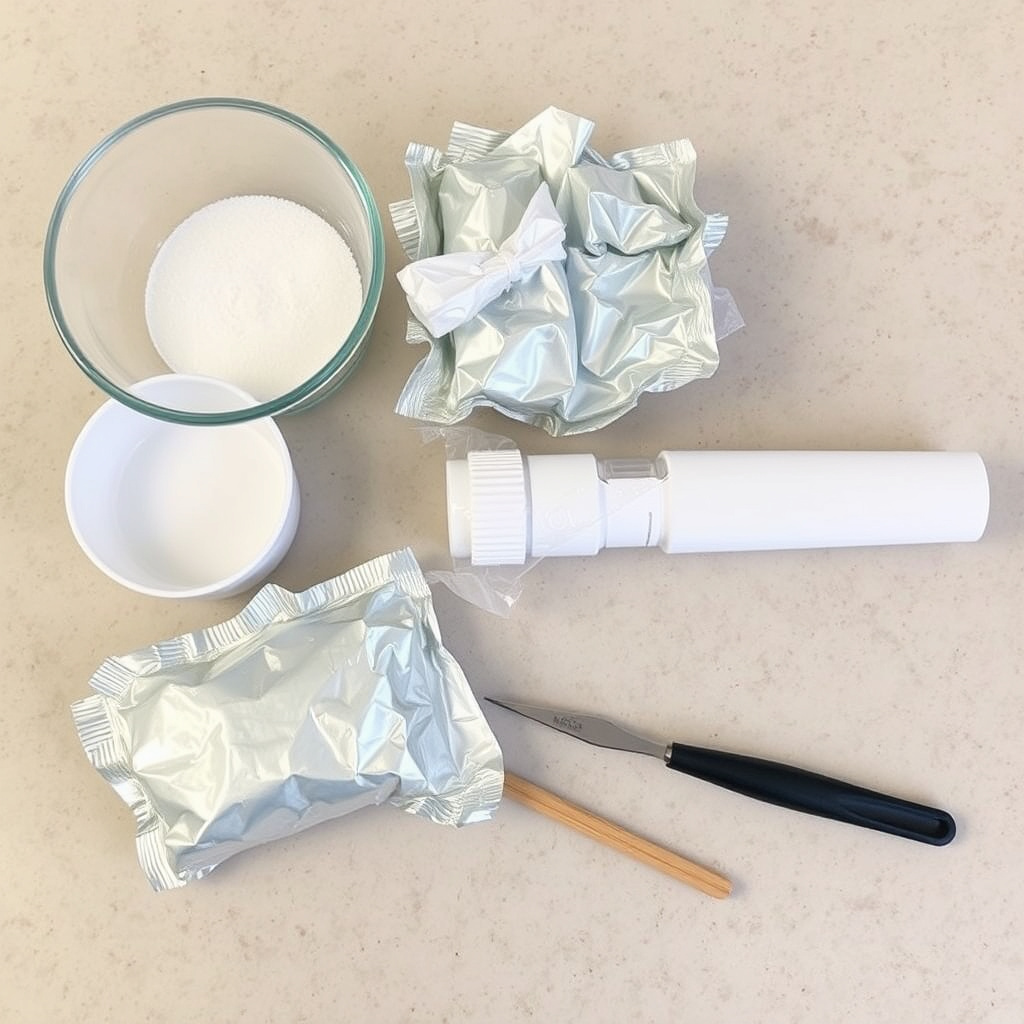
Soaking nails in acetone using foil wraps and cotton balls softens the dried powder for gentle removal. Avoid peeling or scraping the powder off, which can damage nail layers.
Gradually filing the surface after soaking and using a wooden stick to lift the soft powder preserves nail health. Follow finishing with nail oil treatment to nourish nails post-removal.
- Soak nails in acetone with foil wraps
- Avoid forceful peeling or scraping
- Use oil treatments after removal
Health and Safety Considerations When Using Dip Powder

Ventilation and Allergic Reactions
Dip powders release fine particles and fumes from chemicals like acrylic monomers during application. Working in a well-ventilated space reduces inhalation risk and prevents allergic reactions or headaches.
Wear a mask if you are sensitive to dust or fumes, and take breaks to avoid prolonged exposure.
- Work in well-ventilated areas
- Use masks when powder dust is present
- Take breaks during long sessions
For deeper background on various nail enhancement techniques, including dip powder, check out dip powder nails on Wikipedia. dip powder nails on Wikipedia.
Signs You Should Stop Using Dip Powder
If you notice redness, itching, swelling, or ongoing nail brittleness after dip powder use, it might indicate an allergy or overexposure to nail chemicals. Discontinue use and consult a dermatologist as needed.
Avoid using dip powders if you have existing nail infections or severe skin conditions around nails to prevent exacerbation.
Comparison of Popular Dip Powder Nail Kits
Here’s a comparison of four popular dip powder nail kits, highlighting their features, price points, and best-use scenarios to help you choose.
| Kit | Colors Included | Price Range | Best For |
|---|---|---|---|
| Kiara Sky Nail Dip System | 20+ colors | $40-$50 | Professional-quality, wide color range |
| SNS Nail Dip Powder Kit | 30+ colors | $50-$70 | Long-lasting, salon favorite |
| Revlon Nail Art Kit | 10 colors | $25-$35 | Budget-friendly, beginner kits |
| Ella + Mila Dip Powder Kit | 15 colors | $40-$55 | Non-toxic, sensitive skin friendly |
Frequently Asked Questions
How long does a dip powder manicure last?
A properly applied dip powder manicure typically lasts 3 to 4 weeks without chipping, thanks to its durable acrylic-based formula.
Can I apply dip powder over gel nails?
It’s not recommended to apply dip powder directly over gel nails, as it can cause adhesion issues. Removing gel polish before application yields better results.
Is dip powder harmful to natural nails?
When applied and removed correctly, dip powder is relatively safe but overuse or improper removal can weaken natural nails or cause damage.
Do I need a UV lamp for dip powder nails?
No, dip powder nails harden with an activator liquid and do not require UV or LED lamps like gel polish.
Can I remove dip powder nails at home safely?
Yes, by soaking nails in acetone using foil wraps and gently removing softened powder, you can safely remove dip powder nails without damage.
Key Takeaways
- Proper nail prep is essential for dip powder durability.
- Use thin layers of base and powder for smooth application.
- Choose hypoallergenic powders if you have sensitive nails.
- Safe removal preserves natural nail health.
Conclusion
Applying dip powder nails involves attention to detail in preparation, layering, and finishing to create strong, lasting manicures. The main keyword ‘how to apply dip powder’ threads through this process, encouraging deliberate, careful steps that make the difference between a professional look and premature chipping. Prioritizing clean, dry nails and technique over speed ensures the powder bonds well and the finish stays smooth and durable.
For those beginning or exploring dip powder nail kits, options like Kiara Sky or Ella + Mila provide excellent choices depending on your priorities—whether seeking broad color ranges or non-toxic ingredients. Avoiding common mistakes such as thick base coats or skipping nail cleansing will help your nails look better and last longer. Plus, the secondary keyword, dip powder nail kit, reappears as an anchor for assembling supplies that suit your style and nail type.
Once comfortable with the application technique, maintaining your manicure with cuticle oils and gentle care will extend wear. If removal becomes necessary, always follow safe methods with acetone soaking rather than peeling. Taking these steps will let you enjoy salon-quality dip powder nails conveniently at home, making this technique a valuable addition to your nail care routine.