How to Cut a Fade with Clippers: A Step-by-Step Guide for Smooth Blends
Cutting a fade with clippers involves blending hair lengths seamlessly from short at the bottom to longer on top, creating a smooth gradient. Starting with clean, dry hair, you use different clipper guards to gradually transition the hair length while moving carefully to avoid sharp lines. The process requires patience and consistent movement to achieve a polished look.
Many people want to master fading with clippers because this style suits various hair types, ages, and lifestyles. It frames the face well and looks modern yet classic. Knowing how to cut a fade lets you maintain your haircut longer and can save trips to the barber. With some practice, fades can be done efficiently and give a tidy, fashionable appearance.
This article explains how to cut a fade with clippers precisely. You'll learn about choosing tools, understanding guard sizes, clipping techniques for blending, and finishing touches. Additionally, we'll cover common fade styles and compare popular clipper types to help you pick the right gear.
Choosing the Right Clippers and Guards for a Fade
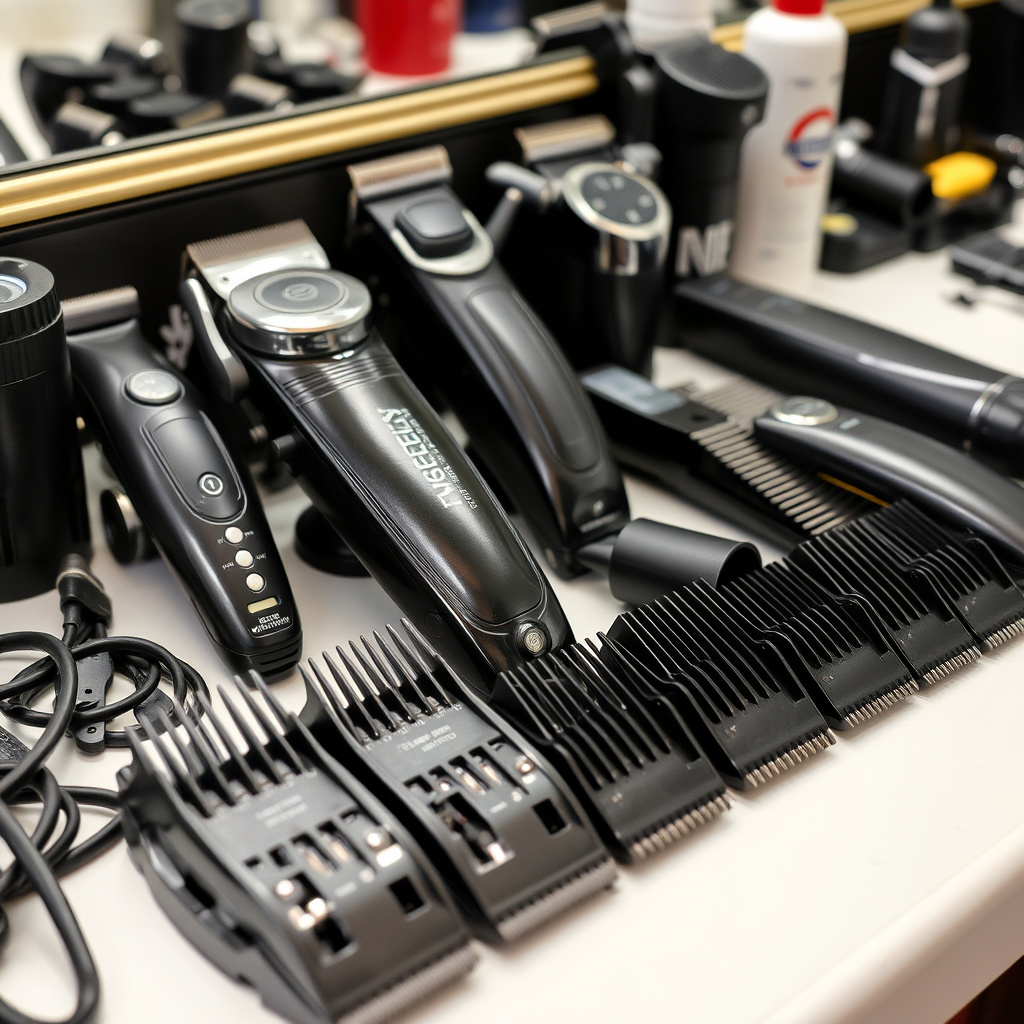
Types of Clippers Suitable for Fades
For cutting a fade, cordless or corded clippers both work well, but precision models with adjustable blades offer greater control. Professional-grade clippers with powerful motors reduce snagging and produce smoother cuts, especially on thick hair. Entry-level clippers can manage fades, though endurance and blade sharpness might be limited.
Look for clippers that allow easy attachment changes and have consistent rotational speed. A quieter motor is a plus for comfort during the process. Most barbers favor clippers that fit comfortably in hand for better maneuverability around the head’s curves.
- Corded vs. cordless preference
- Motor power and blade sharpness
- Ergonomic design for handling
- Blade adjustability and maintenance
Choosing Guards and Understanding Guard Numbers
Clipper guards come in numbered sizes, each corresponding to a specific hair length left after cutting. Lower numbers mean shorter cuts, essential for the bottom of a fade, while higher numbers are used for longer hair blending into the crown. Using multiple guard sizes allows smooth graduations between lengths.
Knowing guard sizes is crucial because a two-guard difference can create a harsh line rather than a fade. Typically, fades use sizes ranging from 0 or 1 at the base, progressing through sizes 2, 3, and 4 moving upward. Experimenting with guard sizes before starting can help achieve desired results.
- 0 guard: very short/bald look
- 1 guard: about 1/8 inch hair length
- 2-4 guards: for gradual length increases
- Balancing guard sizes to blend cleanly
Step-by-Step Guide to Cutting a Fade with Clippers

Preparing the Hair and Setting Up Tools
Start with clean, dry hair combed in the natural growth direction. Position the client or yourself in a well-lit area with a mirror available for checking the cut from all angles. Assemble clippers, guards, scissors, and a comb within easy reach before beginning.
Put on an adjustable cape or towel to catch trimmed hair. Begin inspection by deciding fade style—low, mid, or high—and mark key transition points with a light combing or clipper blade without guard to visualize progression.
- Wash and dry hair thoroughly
- Comb hair to reveal natural direction
- Organize tools and guards beforehand
- Determine fade style and transition lines
Executing the Fade Cut in Layers
Attach the shortest guard (#0 or #1) and clip around the lower portion of the head using upward motions, keeping the clipper blade flat against the scalp. Work evenly around the perimeter, then move to a slightly longer guard (e.g., #2) just above the initial line to create the next layer.
Use flicking or scooping motions with the clippers at fade line boundaries to soften harsh lines. Gradually climb in guard sizes for each upper layer, blending carefully where lengths overlap. Cross-check symmetry regularly and adjust pressure to maintain uniformity.
- Work from shortest to longest guards
- Use controlled upward blade strokes
- Flick out harsh lines at transitions
- Keep symmetry by checking in mirror
Techniques for Blending and Fading with Clippers

Using Clipper Over Comb Method
The clipper-over-comb technique involves holding a comb at an angle over the hair and running clippers over it to blend different lengths. This method is ideal for controlled fading and smoothing out lines where guard lengths meet, allowing customization between lengths.
By adjusting the comb’s angle and how much hair it lifts, you can fine-tune the fade’s softness. This approach requires practice to synchronize comb pressure with clipper movements but delivers a refined gradient effect when mastered.
For more on this, see our related guide: How to Cut a Buzz Cut with Clippers: A Step-by-Step Guide.
Lever Adjustments and Their Effects
Many clippers feature adjustable blades with a lever that changes cutting length in between guards. Opening the lever extends the blade, providing a longer hair cut without changing guards. Closing it tightens the cut for shorter trims.
Lever adjustments are particularly useful during fades to smooth transitions subtly. Combining lever settings with varying guards gives finer control over blending and reduces visible lines for a polished finish.
- Lever fully closed: shortest cut length
- Lever partially open: intermediate length
- Using lever for micro blends
- Combining lever with guard changes
Fade Styles and Suitable Hair Types

Common Fade Variations Explained
There are several fade styles, including low, mid, high, and skin fades, each differing in where the fade starts and how dramatic the transition is. Low fades begin just above the ear, blending subtly upward. High fades start near the crown for a bolder contrast. Skin fades shave hair down to the scalp at the base.
Choosing a fade depends on face shape, lifestyle, and preference. Low fades suit conservative styles, while high and skin fades offer edgy looks. Each requires tweaking clipper settings and guard lengths to achieve proper gradient effects.
- Low fade: gradual, subtle
- Mid fade: balanced transition
- High fade: bold contrast
- Skin fade: very short base
Hair Texture and Fade Suitability
Fade haircuts work with straight, wavy, and curly textures, but adaptation is needed. Curly or kinky hair often shows fade lines more prominently, so blending must be thorough with additional clipper-over-comb work. Straight hair fades smoothly with guard blends alone.
Hair density also impacts fade ease. Thick hair may require more precise layering, and fine hair benefits from lighter blending to avoid revealing scalp excessively. Considering your hair’s natural pattern informs fade style choices and execution.
Maintenance and Finishing Touches After the Fade

Cleaning Up Edges and Necklines
After completing the fade, use a trimmer without a guard or with a very short guard to clean the edges around the hairline, ears, and neckline. Crisp edges define the fade’s neatness and overall appearance. Work carefully in small sections for precise, sharp lines.
If available, use a straight razor or detailing blade for skin-level precision around the sides and back. Be cautious with razor use to avoid irritation or cuts, focusing on symmetry and smoothing any uneven spots left by clippers.
- Use trimmer for neckline and sideburns
- Straight razor for sharp edges if skilled
- Check symmetry in mirror
- Remove loose hairs with brush or blower
For more on this, see our related guide: How to Cut Your Own Hair with a Trimmer: A Step-by-Step Guide.
Post-Cut Hair Care Recommendations
Apply a light moisturizer or scalp oil to soothe skin after clipping, especially if the fade involves very short lengths or skin fades. Avoid heavy products that might weigh hair down or interfere with natural texture.
Regular trimming every 2-3 weeks maintains the fade’s crisp look. Wash hair with quality shampoo and conditioner suited to hair type to keep the scalp healthy and hair looking fresh between fades.
Selecting Clippers: Comparing Options for the Best Fades

Budget Clippers vs. Professional Clippers
Budget clippers are more affordable and suitable for beginners practicing fades. However, they often lack motor power and sharpness over time, making fine blends harder. They may also overheat or produce inconsistent cuts during long sessions.
Professional clippers come with high-grade materials, powerful motors, and adjustable blades, handling thick hair and complex fades competently. Their price reflects durability and precision, favored by barbers and enthusiasts aiming for quality results.
- Budget models: lower cost, less power
- Professional models: precision, durability
- Consider how often fades will be cut
- Check warranty and service options
For a more detailed historical and technical background on fade haircut techniques, refer to this Wikipedia article. fade haircut techniques.
Corded vs. Cordless Clippers
Corded clippers provide consistent power without battery limits, preferred when cutting multiple fades in sequence or thick hair. They tend to be heavier and less mobile due to the cord.
Cordless clippers offer mobility and convenience, especially for home use or travel. Their battery life varies, so picking models with long run times and quick charge capacities aids fade work. Some modern cordless models rival corded power.
For fade haircuts, consider where and how you work before deciding which type fits your needs best.
- Corded: constant power, heavier
- Cordless: portability, battery dependent
- Battery life important for cordless
- Weight and ergonomics affect comfort
Comparison of Popular Clippers for Fade Haircuts
Here's a side-by-side look at common clipper categories to help find your right tool for fade haircuts.
| Clipper Category | Motor Power | Adjustable Blade | Cord/Cordless | Price Range |
|---|---|---|---|---|
| Budget Clippers | Moderate | Limited or none | Usually corded | $20 – $50 |
| Professional Corded Clippers | High | Yes | Corded | $80 – $200 |
| Professional Cordless Clippers | High | Yes | Cordless | $100 – $250 |
| Hybrid Models | High | Yes | Corded and Cordless options | $120 – $300 |
Frequently Asked Questions
How long does it take to cut a fade with clippers?
Cutting a fade usually takes between 20 to 45 minutes depending on skill level, hair type, and fade complexity. Beginners may take longer, while experienced barbers can finish more quickly.
Can I cut a fade on myself using clippers?
Yes, with patience and good mirrors, you can cut a fade on yourself. Start with longer guard settings and practice blending carefully. It helps to have a second mirror to see the back of your head.
What guard sizes are best for a fade haircut?
Using a range from #0 or #1 at the bottom to #3 or #4 at the top usually creates smooth fades. Adjust the guard numbers depending on desired length and hair density.
Should I use scissors in addition to clippers for fades?
Scissors are useful for trimming top hair after the fade is done with clippers, especially for longer hair. For the fade itself, clippers are the main tool.
How do I maintain my fade haircut?
Regular trims every 2 to 3 weeks keep fades looking sharp. Use quality hair care products and clean your clippers after use to maintain performance.
Key Takeaways
- Use multiple guard sizes and lever adjustments for smooth fades.
- Choose clippers based on power needs and personal comfort.
- Blend carefully with clipper-over-comb and flicking techniques.
- Regular maintenance keeps fades sharp and hair healthy.
Conclusion
Cutting a fade with clippers requires understanding how to transition hair lengths gradually using the right guards and blending methods. Selecting appropriate clippers with adjustable blades makes the process easier and results more polished. Paying attention to symmetry and technique during each step produces a professional-looking fade, no matter the setting. Patience and frequent practice are key to mastering clean fades that suit any hair texture.
For those seeking a simple fade, starting with a low or mid fade using guards from #1 to #3 is highly recommended. When you want sharper contrasts, high fades or skin fades demand more precise blending and often benefit from professional clippers with lever adjustments. If fade maintenance is your goal, investing in powerful cordless clippers can keep hair trimmed conveniently between barber visits. Meanwhile, budget options remain useful for beginners refining their skills.
The next step is to gather quality clippers and accessories tailored for fade haircuts and follow a methodical clipping routine. Using detailed guides and watching tutorial videos can reinforce techniques. Over time, fading will become a straightforward part of your grooming or barbering toolkit, giving you control over your appearance and confidence in your haircuts.


