How to Shape Coffin Nails: A Step-by-Step Guide for Perfect Acrylics
Shaping coffin nails requires precise filing and sculpting to create the tapered square design that defines this popular style. Start by trimming the nails to your desired length, then file the sides straight and gently taper towards a squared-off tip. This approach creates the distinct coffin or ballerina silhouette that combines elegance with edge.
Coffin nails have surged in popularity for their chic and bold look, worn often with acrylics or gels. Achieving the perfect shape enhances both durability and aesthetic appeal, making them a favored choice for fashion-forward manicures. Understanding the shaping steps is essential for maintaining strong, stylish nails at home or professionally.
In this guide, you’ll find detailed instructions on shaping coffin nails, including tools needed, filing techniques, and tips for maintaining the shape during growth. We’ll also explore the best coffin nail shaping techniques to help you customize length and angle, ensuring a flawless finish tailored to your style.
Tools You Need for Shaping Coffin Nails
Selecting the Right Files and Clippers
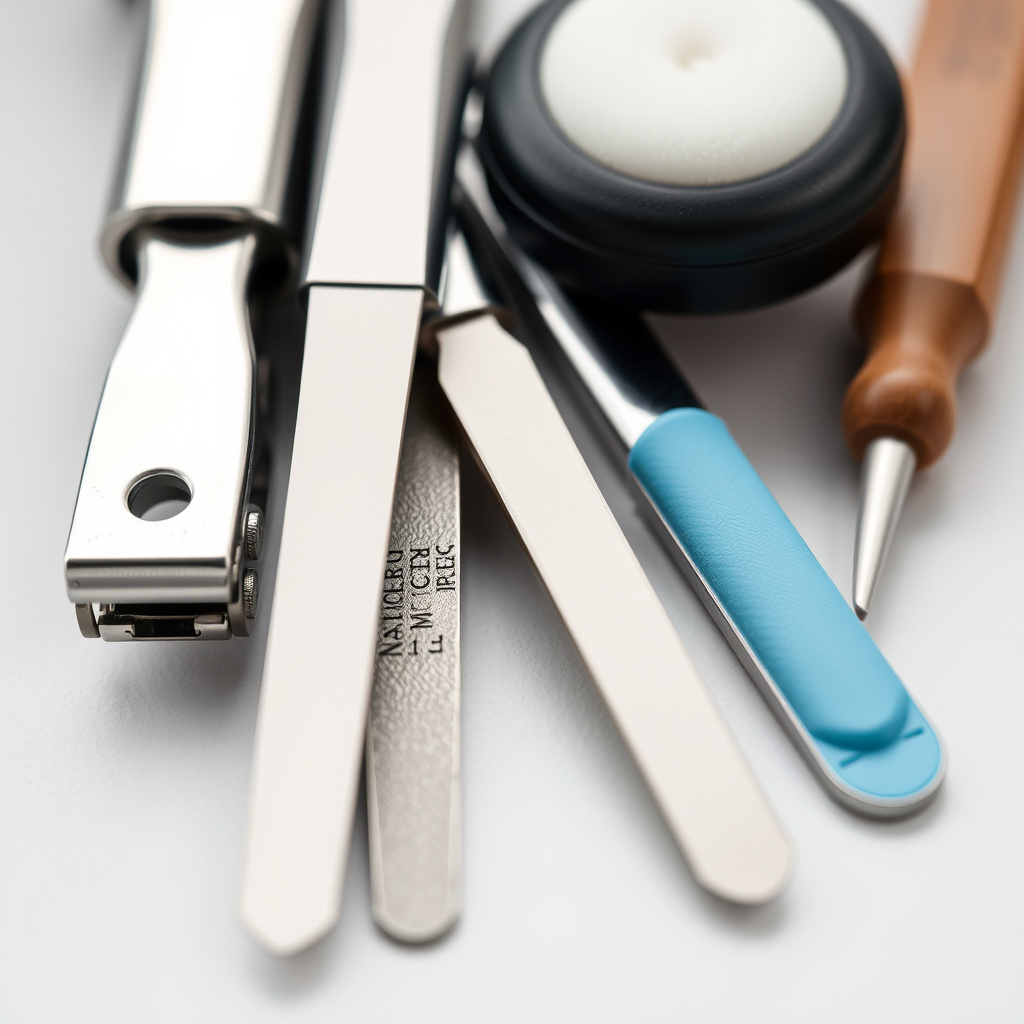
Using proper tools is the foundation of shaping coffin nails successfully. Start with sharp nail clippers to reduce nail length uniformly. A coarse nail file, ideally 100/180 grit, helps initially shape the edges quickly, while a finer file smooths out roughness. Avoid metal files, which can damage acrylic surfaces.
A well-chosen buffer completes the set by polishing edges and smoothing the nail surface to a gentle shine. Having these tools ensures you can refine the coffin shape with precision and protect your acrylic or natural nails from splitting or chipping during shaping.
- 100/180 grit nail file for shaping
- Fine-grit file (220+) for smoothing
- Quality nail clippers with sharp edges
- Buffer for finishing touch
Additional Tools for Acrylic Applications
For acrylic coffin nails, extra tools like a nail drill with sanding bands can speed up blending and shaping. The nail drill helps contour thick acrylics smoothly, especially around the edges and tips. A cuticle pusher and nail dehydrator prepare the nail bed for applying or reshaping acrylic layers.
Using these additional tools improves control and neatness, resulting in uniform coffin nails that maintain their strength and style longer. Proper tool care and sanitation are essential to keep nails healthy throughout the shaping process.
- Electric nail drill for precision shaping
- Cuticle pusher and trimmer
- Nail dehydrator and primer for acrylics
Step-by-Step Process to Shape Coffin Nails

Initial Nail Trimming and Side Filing
Begin shaping coffin nails by clipping nails to a medium-long length. Use scissors or clippers to create a basic straight edge. Next, file the sides of each nail straight down, not angling inward yet. This creates two parallel edges before tapering begins.
Hold the nail file perpendicular to the nail side to file evenly. This stage sets the foundation for the coffin’s characteristic tapered look. Avoid making the sides too narrow at this phase to prevent weak tips later.
Tapering Towards a Squared-Off Tip
To form the coffin silhouette, gently file the side edges inward in smooth strokes, tapering towards a flat, squared tip rather than a rounded one. The taper should be gradual, roughly mimicking a coffin or ballerina slipper shape.
Check symmetry frequently on each nail to ensure matching shapes. Use light pressure with the file to avoid uneven edges. The final squared tip provides a bold but elegant aesthetic, essential in coffin nail artistry.
Advanced Techniques for Perfect Coffin Nail Shapes

Using a Nail Drill for Smooth Edges
A nail drill with appropriate sanding bands can refine coffin nails faster than hand filing alone. Use low speed and light pressure, especially near edges and tips to prevent overheating and thinning acrylic layers.
Drills help blend the filed edges naturally into the nail surface for a professional finish. Practice steady hand movements along the tapered sides to achieve uniform smoothness.
- Choose 180-grit sanding bands for shaping
- Use gentle, consistent strokes
- Avoid excessive heat buildup
For more on this, see our related guide: Types of Nail Salon Services: A Complete Guide to Pampering Options.
Customizing Length and Angle for Unique Styles
Coffin nails can be customized by altering length and taper angle. Longer nails allow for more dramatic tapering, while shorter ones keep the shape subtle. Adjust side filing angles to vary from a soft taper to a steep coffin shape matching personal preference.
Custom shaping suits different hand sizes and lifestyles, balancing aesthetic with practicality. Experiment with small increments to find the flattering coffin nail shape for each individual.
- Longer nails = sharper tapers
- Shorter nails = softer silhouettes
- Adjust angles for desired effect
Maintaining the Coffin Shape Over Time

Filing Touch-Ups and Edge Maintenance
To keep coffin nails looking fresh, gentle filing touch-ups between salon visits is essential. Lightly smooth any chips or rough edges with a fine nail file, following the original shape carefully.
Regular maintenance prevents cracks and extends the life of acrylic or gel nails. Avoid over-filing which can thin out tips and weaken the overall shape.
- Use fine-grit file for touch-ups
- Avoid aggressive filing near tips
- File only when necessary
Protective Coatings and Nail Care Tips
Applying a clear topcoat or nail strengthener reinforces coffin nail edges against impacts. Moisturizing cuticles and avoiding harsh chemicals helps maintain nail health under the acrylic surface.
Consider overnight nail treatments with strengthening oils to boost resilience. Good nail care practices protect the coffin shape and promote longer wear of manicures.
- Apply clear topcoat weekly
- Use cuticle oil daily
- Avoid harsh detergents and chemicals
Common Mistakes to Avoid When Shaping Coffin Nails

Over-Filing and Uneven Shapes
One frequent error is over-filing nails, which thins edges and weakens acrylic layers, causing premature breakage. Uneven filing can distort the coffin shape, making nails look misshapen or asymmetrical.
Maintain a light touch and check shapes in natural light regularly. Stop filing as soon as the desired taper and squared tip emerge.
Ignoring Symmetry and Angle Consistency
Inconsistent angles on either side of a nail lead to an unbalanced coffin design. Symmetry is key in creating the iconic coffin nail silhouette. Many new enthusiasts neglect to compare both hands or adjacent nails during filing.
Use a nail shape guide or ruler if needed and frequently step back to assess overall uniformity in length and shape. Consistent angles guarantee elegance and visual appeal.
Styling Coffin Nails After Shaping

Popular Color Choices and Nail Art
Once shaped, coffin nails offer a sleek canvas for various nail art trends. Matte or glossy finishes showcase their sharp angles, while delicate designs like florals or geometric patterns complement the elongated silhouette.
Neutral tones like beige, light pinks, and mauves give an elegant vibe. Bold colors and metallic accents emphasize the edgy coffin shape for statement-making manicures.
- Matte topcoat for modern look
- Floral and geometric nail art
- Metallic and glitter accents
For a broader overview of nail shapes and care, see the nail care and styling basics on Wikipedia. Nail care and styling basics.
Matching Coffin Nails to Occasions
Wear coffin nails in styles suitable to occasions, from subtle French tip designs for professional settings to bright, vibrant colors for parties. Their versatile shape fits casual and formal contexts elegantly.
Adjust length and design reactively; shorter and softer tapers suit everyday wear better for comfort, while long, dramatic coffin nails boost glamour on special occasions.
- French tips for office-friendly nails
- Bright hues for celebrations
- Adjust length based on activity
Coffin Nail Shaping Techniques Comparison
Compare common coffin nail shaping techniques to identify the best fit for your style and skill level.
| Technique | Tools Used | Skill Level | Finish Quality | Time Required |
|---|---|---|---|---|
| Hand Filing | Nail files, clippers | Beginner to Intermediate | Smooth if careful | 15-30 minutes |
| Nail Drill Shaping | Electric drill, sanding bands | Intermediate to Expert | Very smooth, professional | 10-20 minutes |
| Sculpting Acrylic Tips | Acrylic powder, brushes | Expert | Custom shape, durable | 30-45 minutes |
| Gel Nail Shaping | UV lamp, gel files | Intermediate | Glossy, strong finish | 20-30 minutes |
Frequently Asked Questions
Can I shape coffin nails on natural nails?
Yes, coffin nails can be shaped on natural nails, but strength may be limited. Filing gently and maintaining nail health is important to avoid breakage when shaping natural coffin nails.
How long does it take to shape coffin nails?
Shaping coffin nails by hand filing typically takes 15 to 30 minutes depending on nail length and experience. Using a nail drill can reduce time to around 10 to 20 minutes.
What is the best file grit for shaping coffin nails?
A 100/180 grit dual-sided nail file is ideal for initial shaping, while a finer 220-grit file works well for smoothing and finishing coffin nails.
How often should I maintain coffin nail shape?
To keep coffin nails neat, light filing every 1-2 weeks is recommended depending on growth and wear. Avoid excessive filing to preserve nail strength.
Can coffin nails be shaped short?
Yes, coffin nails can be shaped short for a subtle look. Short coffin nails have a softer taper and squared tip while maintaining the signature silhouette.
Key Takeaways
- Shaping coffin nails involves trimming, straight side filing, then tapering towards a squared tip.
- Using proper tools like grit files, buffers, and nail drills enhances shaping precision.
- Regular maintenance preserves shape and prevents damage or uneven edges.
- Customizing length and angle tailors coffin nails to individual style and functionality.
Conclusion
Shaping coffin nails combines technique, careful tool use, and an understanding of nail anatomy to achieve that signature taper with squared edges. Focus on shaping the sides straight before gradually tapering towards a flat tip to craft nails that are both striking and sturdy. The selection and use of appropriate files and drills play a key role in refining the shape and ensuring your nails hold up well over time. Maintaining symmetry and avoiding over-filing keeps the coffin silhouette balanced and prevents weakening fragile tips.
If you’re new to shaping coffin nails, starting with hand filing using medium-coarse grit files provides control and accuracy suited to beginners. For professionals or those experienced, incorporating electric nail drills and sculpting acrylic tips can deliver a perfectly smooth finish and faster shaping. Whether you prefer longer, dramatic coffin nails with sharp tapers or shorter, subtle versions, the best coffin nail shaping techniques adapt to your personal style and nail health.
The best approach is to practice shaping nails gradually, checking symmetry often, and maintaining them regularly with light filing and protective topcoats. Once comfortable with the shape, experiment with colors and nail art to enhance the coffin’s elegant flair. For a reliable resource on nail shapes and care, you might find additional details at the Wikipedia page on nail care and styling.